Image Correction with Curves Adjustment

3 12 2008

How to fix a photo that’s too dark or too light using curves adjustment

By  Dong Tang

Ever taken a photo that’s too dark or too light? You can fix it in only three simple steps using curves adjustment in Photoshop.

  1. Copy and paste your image
  2. Adjust curves
  3. Save your fixed image as a JPEG file

Step 1 – Copy and Paste Image

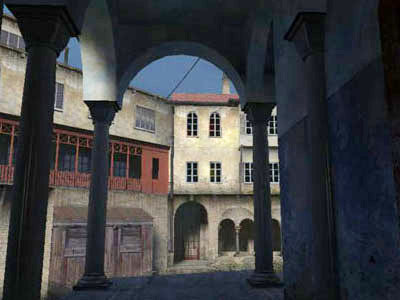
Right click on the under exposed image and select copy. Go to Photoshop page and select Ctrl+n (or select file/new document from the drop down menu). Press enter on the new document panel, paste the image into the new window by pressing Ctrl+V.
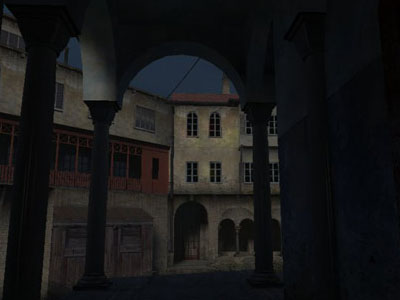
image-correction-curves-02

Step 2 – Adjust Curves

1. Open the curves dialog box

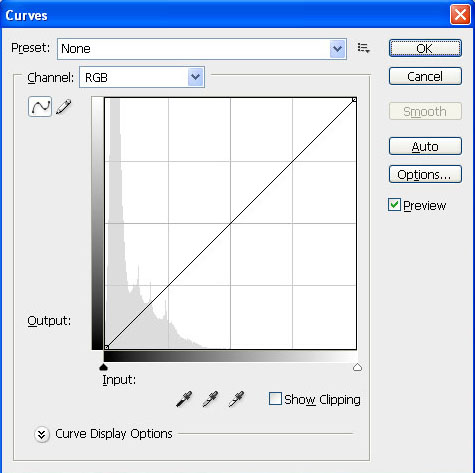
Go to Image>Adjustment>Curves or press Ctrl+M to open the curves dialog box.
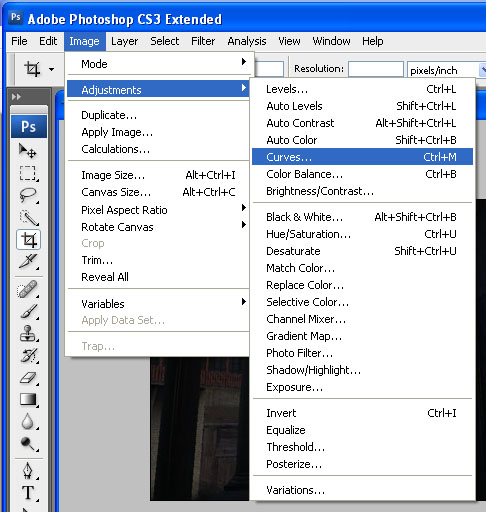
image-correction-curves-03

image-correction-curves-04

2. Adjust curves

Now you can drag the curve to see the changes of your image’s brightness. Once you get the proper brightness press OK.
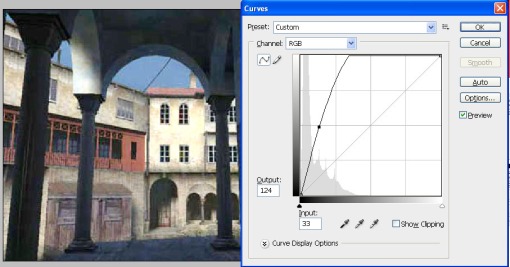
image-correction-curves-05

Step 3 – Save Image as JEPEG File 

Go to File>Save as, choose JPEG format.
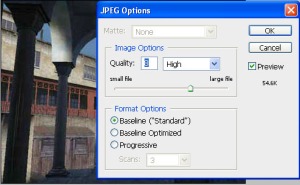
image-correction-curves-07

image-correction-curves-06

Look! The result is perfect.


Image Correction With Levels

2 12 2008

How to lighten up a dark photo using Levels

This exercise is good if you need to lighten up a dark photo. Just follow the steps below to do this simple task. You will learn how to:

  • Copy and paste an image
  • Adjust the Levels
  • Save a file as a JPEG
  • Use Auto Levels

Then go through the steps in detail.

Step 1 – Copy and Paste Image:

Right click on the under exposed image and select copy. Go to Photoshop page and select Ctrl+n (or select file/new document from the drop down menu). Press enter on the new document panel, paste the image into the new window by pressing Ctrl+V.

lmage-correction-011

Step 2 – Adjust Levels:

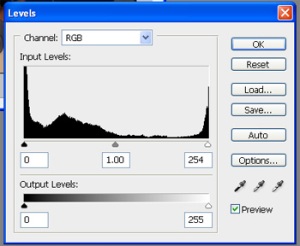
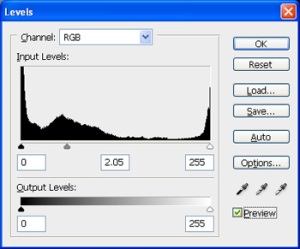
Choose image > Adjustment > Levels. To reduce the tonal range of the photograph to a more ideal range, drag the middle slider toward the left where the histogram begins to climb. This will force those shades of black to lighter values while still retaining the lighter tones on the right side of the histogram.

layers-022

Example of Levels Histogram

Step 3 – Save Image:

Histogram after Adjustment 

Choose File > Save > As JPEG.

layers-04


Step 4 – Alternative Step:

A quick way to adjust the levels of an image is using Auto-Levels:
Choose image > Adjustment > Auto Levels (or short cut: Ctrl+Shft+L)

The results are amazing!