By Dong Tang
In this exercise we will learn how to use Rectangle Tool , Pen Tool, Gradient Tool. Also we will get to know how to apply different layer styles (inner shadow, inner glow, outer glow, gradient overlay, stroke) on an exiting layer for some fantastic effects.
This tutorial is for the more advanced user!
Now let us have a glance at our final image of the fantastic MP4 before we go further into creating it.
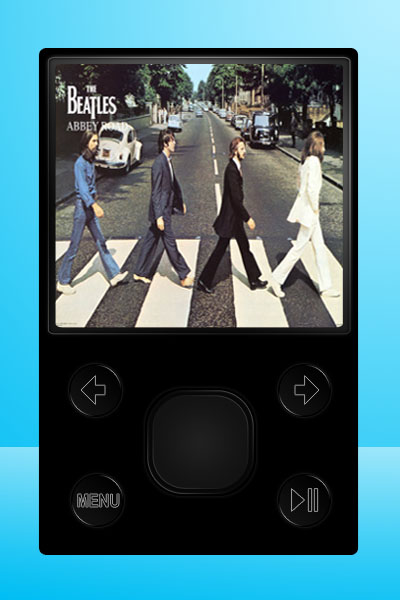
Do you like to create a wonderful MP4 with your favourite poster on it, it’s easy to follow the steps as I did. Let’s Rock & Roll now!
Step1
Creating Background Image
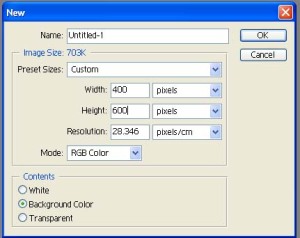
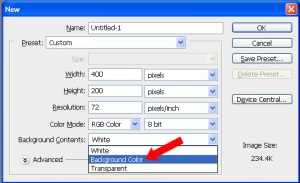
First we open the Photoshop and set the foreground colour to #B5EFFF and the background colour to #00BEF3 ( click on the foreground or background thumbnail on the Tool Panel to open the colour picker), then open a new file with the size of 400×600 pixels and contents of background colour (Ctrl+N or File>New).
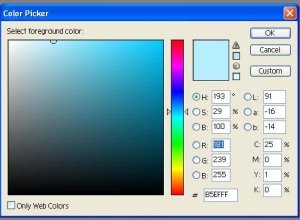
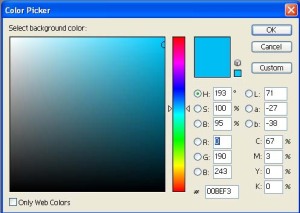
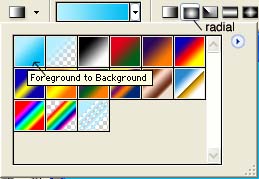
Now we apply a radial gradient with foreground to background effect on our background image, click the Gradient Tool on Tool Panel or press G, then choose Radial Gradient on the option bar and foreground to background gradient from the gradient picker. Drag the cursor from top right corner to the left bottom corner of your image.

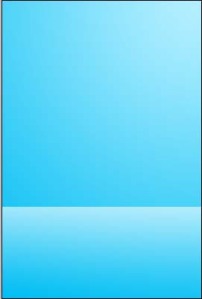
Now we will apply a linear gradient with foreground to transparent effect on the lower 1/4 part of our background image. Click the Rectangular Marquee Tool on Tool panel or press M to select the bottom 1/4 part of the image and set the foreground colour to white(#FFFFFF).
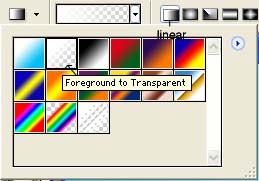
Then choose the foreground to transparent effect form the gradient picker and linear gradient on the option bar, hold the Shift key and drag the cursor from the 1/4 to the bottom of our background image to get the gradient effect on the lower 1/4 part.
Use Select>Deselect or Ctrl+D to deselect your selection. Now set the layer mode of your image from Normal to Soft Light (double click the lock thumbnail on the background layer thumbnail and change the mode from Normal to Soft Light on the New Layer panel).
Step 2
Next we start to create the body and screen of our MP4.
Step 2A. Creating the Body
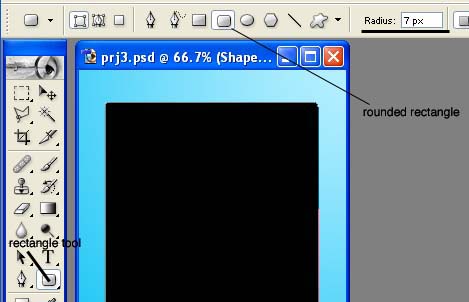
First we create the body using Rounded Rectangle Tool. Change the foreground colour to black (#000000), then click the Rectangle Tool on Tool panel or just press U, choose the Rounded Rectangle Tool on the top option bar with a radius of 7 pxs.
Then drag a rounded rectangle nearly cover the background image for the MP4’s body. For manageable reason, we rename our new layer to S1 by right clicking the layer thumbnail and choosing the Layer Properties to change the name in it.
Now apply a Gradient Overlay effect on our MP4’s body. Using Layer>Layer Style>Gradient Overlay to open the Layer Style Panel.
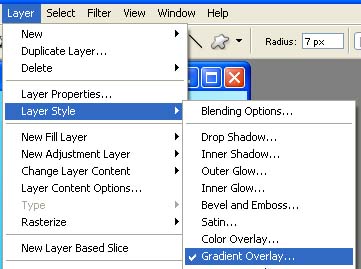
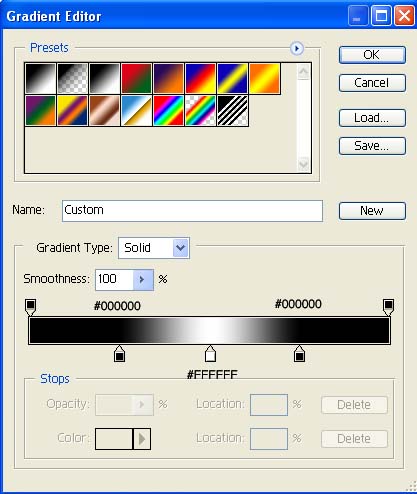
Set the angle of the Gradient Overlay to -101 and click the Gradient thumbnail to change the colour stops as following.
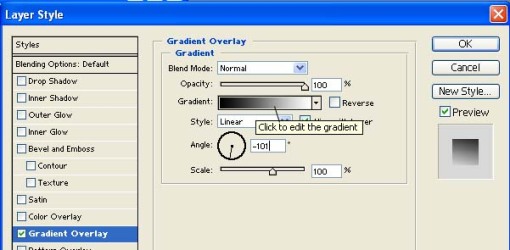
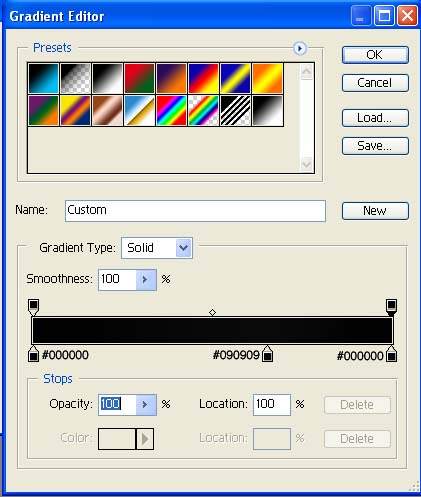
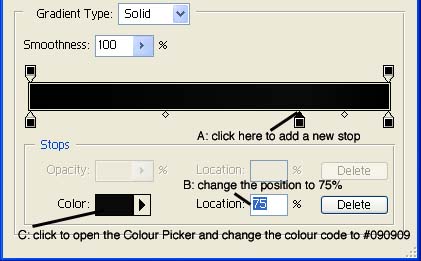
Following are some instruction pictures about adding colour stops and changing colour of colour stops in Gradient Editor.
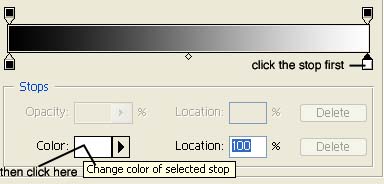
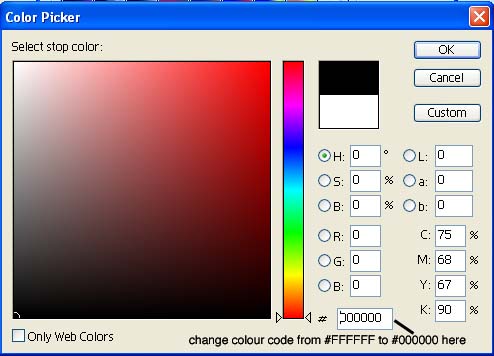
Change the colour from #000000(white) to #FFFFFF(black) in the Colour Picker.
Adding a new colour stop at position 75% with colour #090909.
Step 2B. Creating the Screen
A: Creating outer edge of screen.
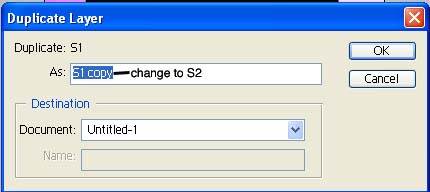
Duplicate the body rounded rectangle by right clicking the S1 layer and selecting Duplicate Layer. Rename the new layer from S1 Copy to S2 in the duplicate layer panel.
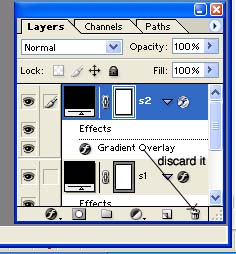
Change the colour of the new rectangle by double clicking the layer thumbnail and changing the colour code to #1E1E1E in Colour Picker. Discard the Gradient Overlay effect by dragging it into trash bin on the layer palette or right clicking the layer thumbnail and selecting Clear Layer Style.

Enter the Free Transform function by Edit>Free Transform Path or Ctrl+T. Drag the top, left, right side into the center separately by 10 pxs, then drag the bottom side up for 200-220 pxs.
For reference purpose, we can open the Rulers by View>Rulers or Ctrl+R and set the Ruler’s unit to pixel by Edit>Preferences>Units & Rulers.
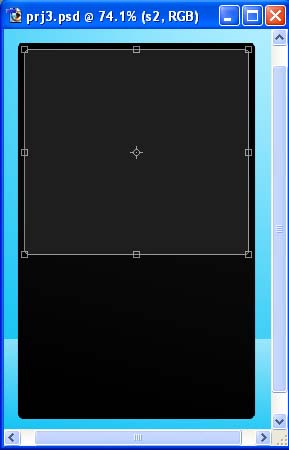
Applying the following layer styles to the new rectangle.
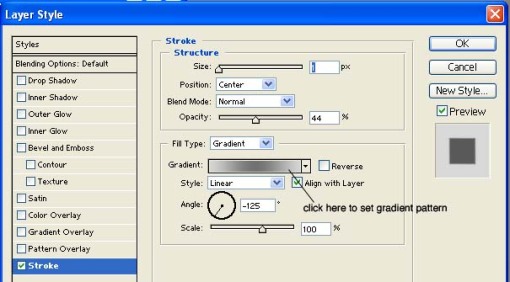
1. Layer>Layer Style>Stroke

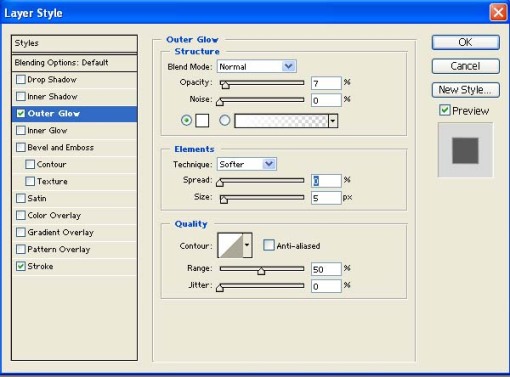
2. Layer>Layer Style>Outer Glow
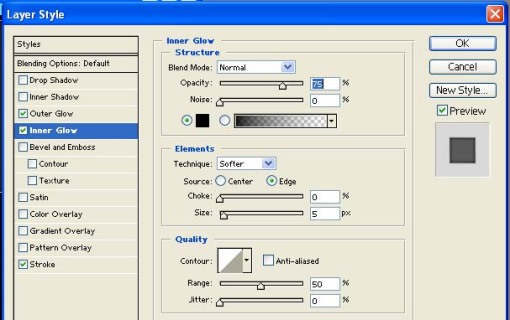
3.Layer>layer Style>Inner Glow
Now we can have a look at the final effect of our screen edge.
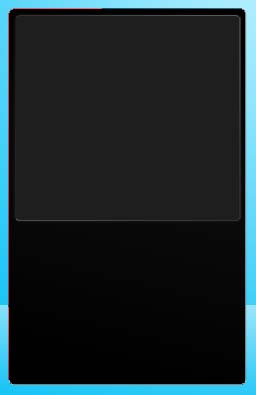
B. Creating Display Part of the Screen
Right clicking on the S2 layer thumbnail and choose Duplicate Layer to copy the screen edge rectangle and change the name of new layer from S2 Copy to S3 in the Duplicate Layer panel.
Discard the layer styles of the new layer S3, drag the layer styles of S4 into trash bin on the layer palette or right click S3 thumbnail and click the Clear Layer Style.
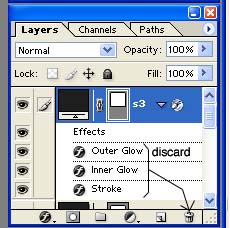
Double click on the s3 layer thumbnail to activate the layer colour picker and change the colour code from #1E1E1E to #0F0F0F.
Enter the Free Transform function by Edit>Free Transform or Ctrl+T. Drag the 4 sides into the center separately by 10 pxs, or you can just hold Alt+Shift and drag one corner of S3 rectangle inwards for 10 pxs.

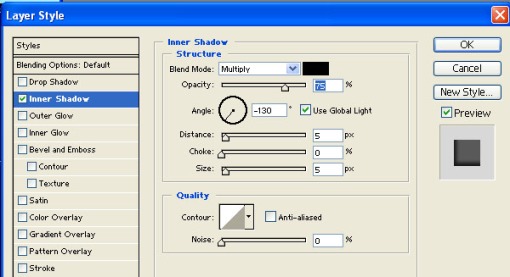
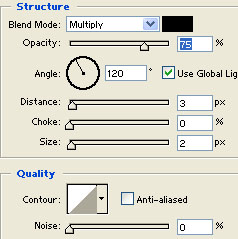
Finally we apply Inner Shadow Layer Style on our S3 layer. (Layer>Layer Style>Inner Shadow)
Now we have finished all the jobs on our screen and can enjoy it for a while.
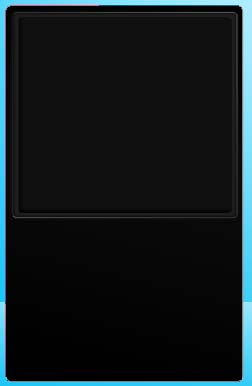
Step 2c. Adding side light to the screen. (optional)
This step will show you how to add some side light effect on our screen, this effect looks good if you use dark colour screen or text on screen, but you can omit this step if you will use colourful picture on the screen.
First copy layer S1, rename it as S4. To do this, we choose S1 layer first by click on S1 layer thumbnail in layer palette, and the use Layer>Duplicate Layer or right click S1 layer thumbnail to choose Duplicate Layer. Our S4 layer should be on the top of all layers. Set our S4 layer’s fill to zero on layer palette.
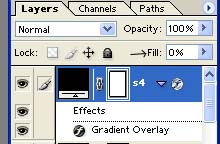
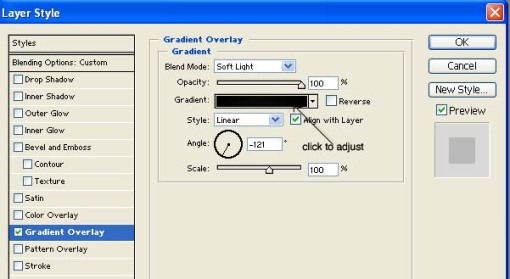
Now go to Layer>Layer Style>Gradient Overlay to change the parimeters of S4’s Gradient Overlay showing as follows.
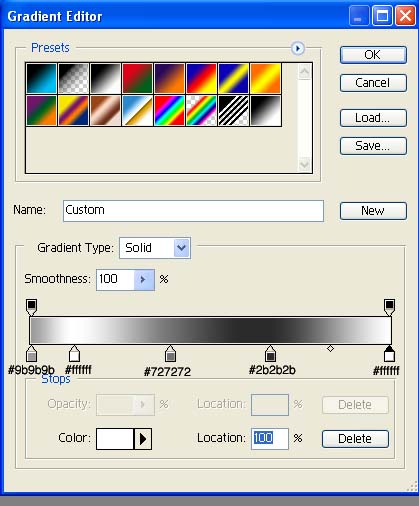
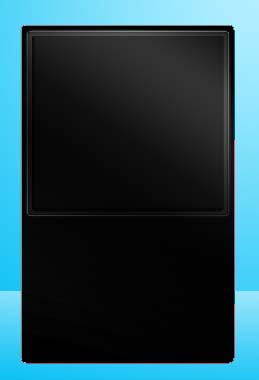
Finally we get the following image.
Step3
Adding Main Button
In this step, we will use a new layer function called Layer Set, a group of layers under one layer set folder. They can be moved or copied together. Using layer sets will make our layer palette tidy and manageable.
A. Go to Layer>Layer New>Layer Set to add a new layer set and rename it MB. Click rectangle tool on tool palette and choose rounded rectangle on option bar, set radius to 35 px and draw a rounded rectangle of 110×110 pxs with black colour.
Rename the new rectangle layer to M1 and discard any layer style if it exists. Now apply Outer Glow on M1 layer ( Layer>Layer Style>Outer Glow ).
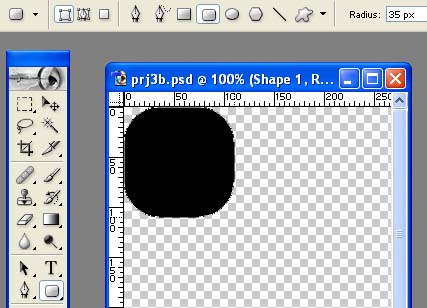
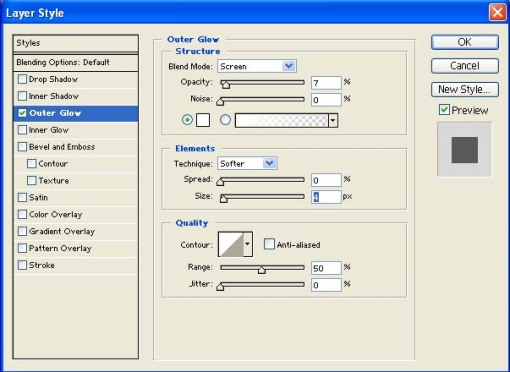
B. Copy the M1 layer and rename it to M2, discard the Outer Glow Layer Style. Change the colour to #070707.
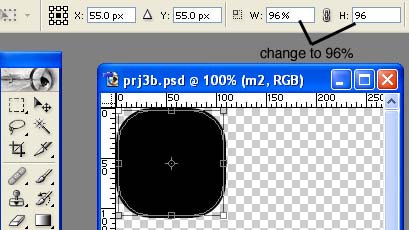
Go to Edit>Free Transform or Ctrl+T to reduce the rectangle 2 px smaller or just change it to 96% of the original one.
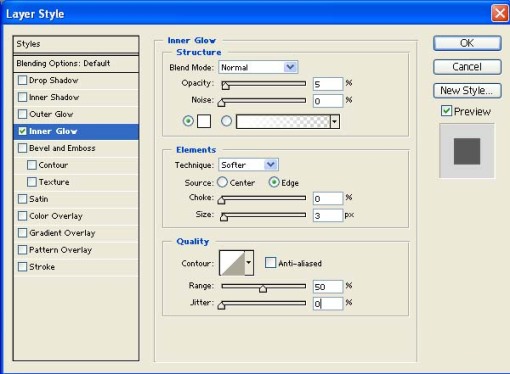
Then apply Inner Glow and Stroke layer styles on the new layer M2.
Layer>Layer Style>Inner Glow
Layer>Layer Style>Stroke
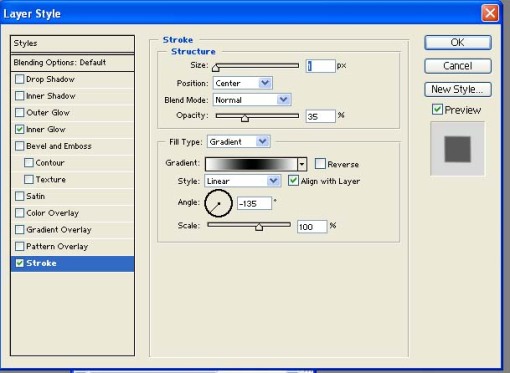
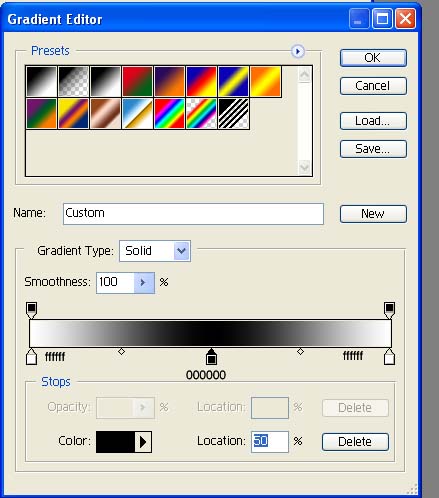
Now we get the image as follow.
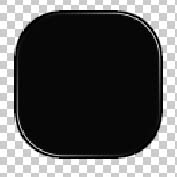
C. Copy the layer M2 and rename it as M3, discard all the layer styles. Go to Edit>Free Transform or Ctrl+T and reduce the size to 95% of original rectangle. Change the colour form #070707 to #000000 (black).
D. Copy the layer M3 and rename it as M4, discard all the layer styles. Go to Edit>Free Transform or Ctrl+T and reduce the size to 95% of original rectangle. Then apply following layer styles, Gradient Overlay and Stroke.
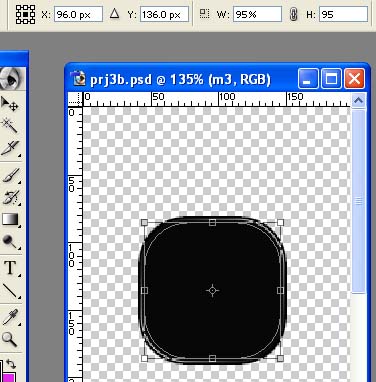
Layer>Layer Style>Gradient Overlay
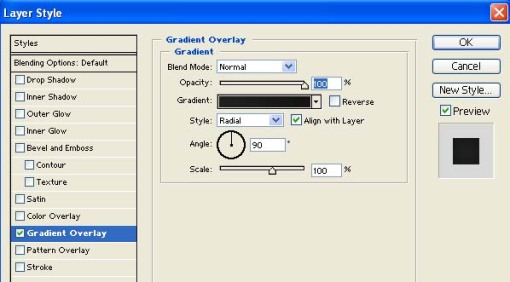
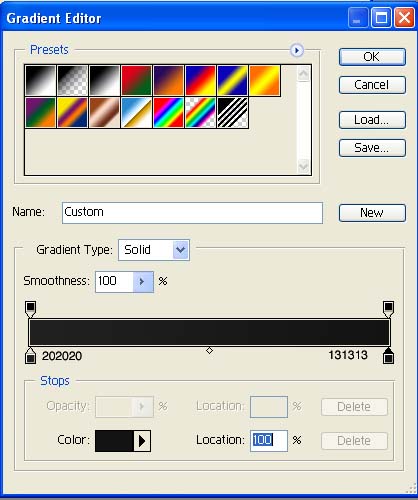
Layer>Layer Style>Stroke
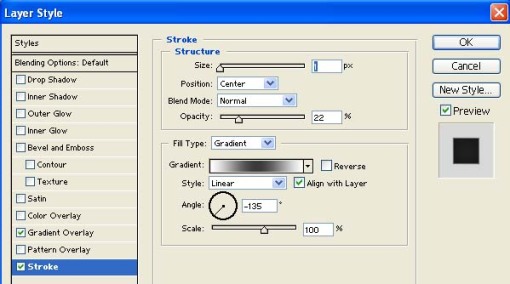
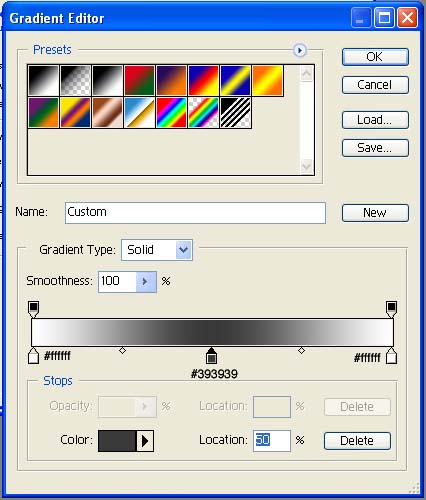
Now we get our main button final image as bellow.
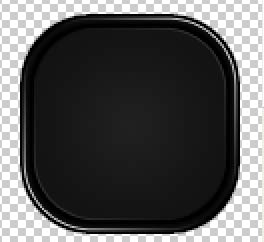
E. Change all layers to visible, click on MB layer set thumbnail and choose Move Tool to place the main button in the center of the lower part of MP4. Now we have finished all our works on the main button.
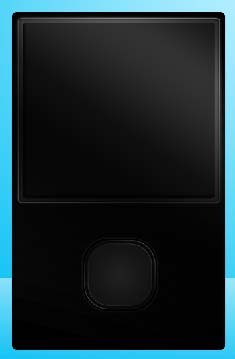
Step 4
Creating Circular Buttons
1. Creating First Circular Button
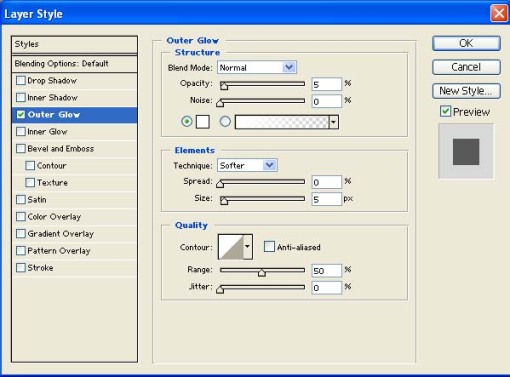
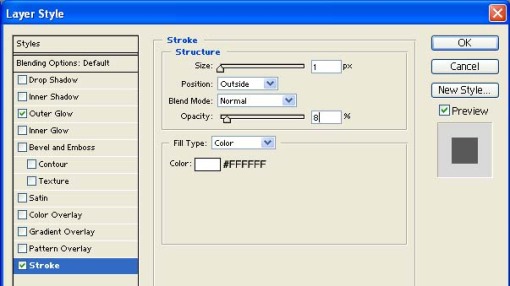
Create a new layer set by clicking on the Create New Layer Set button on the bottom of layer palette or going to Layer>New>Layer Set, and rename the new layer set to CB1. Grab the Ellipse Tool on the tool palette or just press Ukey and choose Ellipse Tool on the top option bar. Hold shift and drag the cursor to draw a circle of black colour with a radius of 50 pxs. Then apply Outer Glow and Stroke layer styles on this new layer.(Name this layer c1)
Layer>Layer Style>Outer Glow
Layer>Layer Style>Stroke
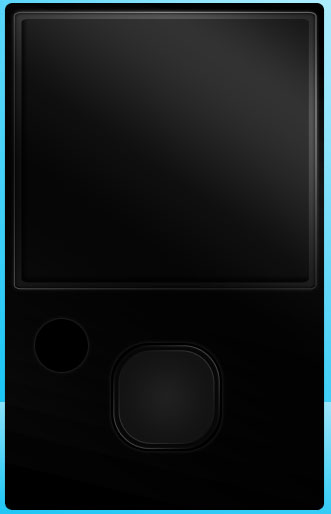
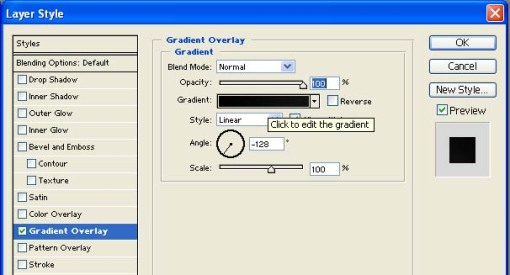
Copy layer C1 and rename it to C2, discard all layer styles, then go to Edit>Free Transform or press Ctrl+Tto reduce the C2 circle 2-3 pxs. Now apply the following layer styles, Gradient Overlay and Stroke.
Layer>Layer Style>Gradient Overlay
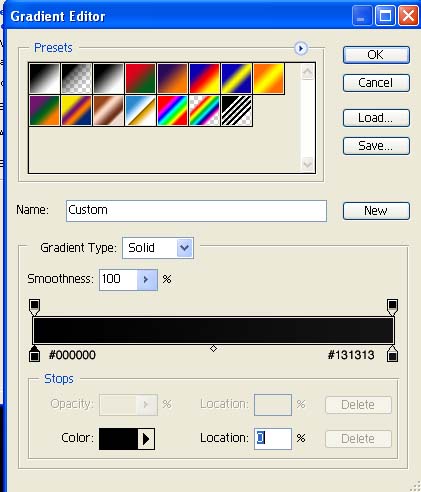
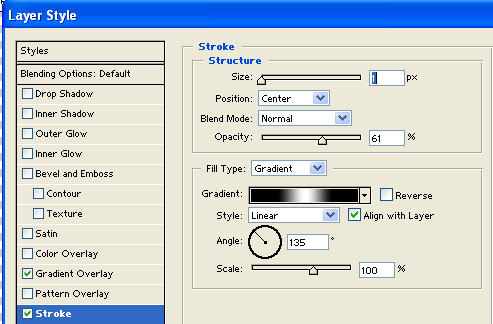
Layer>Layer Style>Stroke
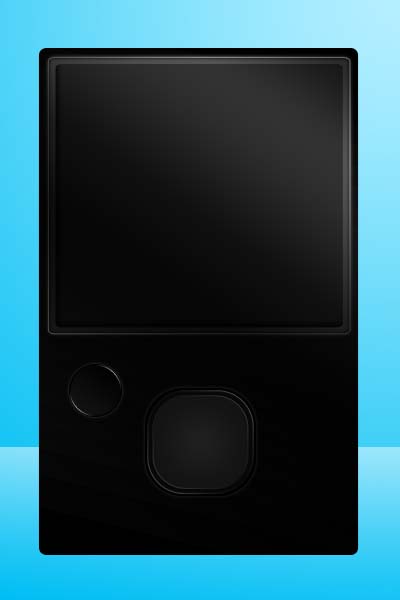
Now we get our first circular button image and we can move it to a desired position.
2. Coping and Moving the Other Buttons
Right clicking on layer set CB1 thumbnail and choose Duplicate Layer Set, rename the new layer to CB2. Repeat this for two times until we get our CB3 and CB4 layers. Choose and move (Move Tool) Cb2, CB3 and CB4 to right top, left bottom and right bottom positions. Now we have all the buttons on the MP4. While moving the buttons you can hold shift key to keep it in same line.
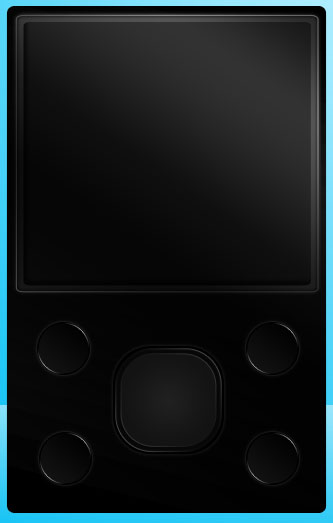
Step5
Creating Icons on the Circular Buttons
1. Click on the arrow thumbnail of layer set CB1. Go to Layer>New>Layer or press Shift+Ctrl+N to open a new layer for our first icon, named as ic1.
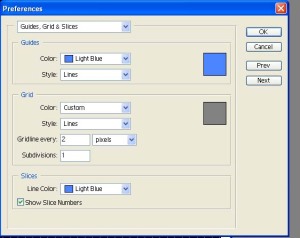
An easy way to draw the new icon is to open the grid lines, use View>Show>Grid or press Ctrl+”, and then use Edit>Preference>Guides, Grid & Slices… to open grid setting panel, set grid line to 2 px.
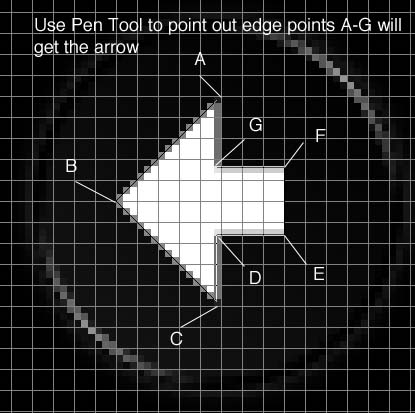
Now use the Pen Tool to draw the first icon, a left arrow. Click the Pen Tool on Tool Palette and set it to Shape Layers with a colour of white. Then draw the arrow as per following picture.
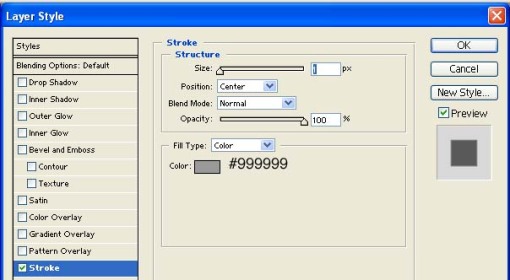
Now apply a layer style of Stroke to the ic1, Layer>Layer Style>Stroke. Use the settings as per following picture.
Copy this layer style to clipboard and we can paste it to our new icon layers later to avoid to set same layer stroke again and again.
To copy layer style, we can use Layer>Layer Style>Copy Layer Style or right click the layer style thumbnail on layer ic1 and choose Copy Layer Style.
The final image of our first icon is here.

2. Copy layer ic1 and rename it to ic2 ( Right click layer ic1 on layer palette to choose Duplicate Layer or use Layer>Duplicate Layer). Open layer set CB2, drag layer ic2 to top of layer set CB2.
Use Edit>Transform>Flip Horizontal to change the left arrow to right arrow, and move it to the center of button cb2. Now we get our second icon, the right arrow.

3. Open layer set CB3, use Layer>New>Layer or press Shift+Ctrl+N to open a new layer for our third icon, named as ic3. Now use Pen Tool to draw our play/pause icon. The grid line is still on for a reference purpose.
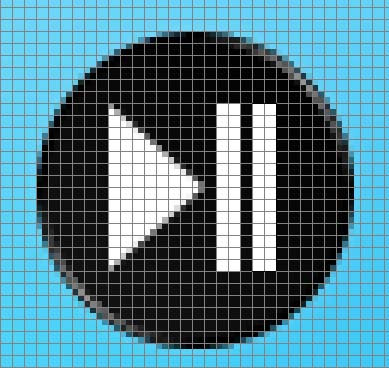
Right click our ic3 layer thumbnail on layer palette and choose Paste Layer Style or use Layer>Style>Paste Layer style to apply the same Stroke layer style as ic1 and ic2 to our new icon layer. Now we get our third icon, the play/pause icon.

4. Open layer set CB4, create a new icon layer ic4 using Layer>New>layer or Shift+Ctrl+N. Paste the layer style to the ic4 layer using the same methods as in ic3 layer.
Now open the Text Tool in tool palette, set it to Arial Narrow, Bold, 18 pt, colour white, add text MENU in the center of our button CB4. Finally we have all our icons now.

Step 6
Adding Picture On Screen.
Open a new layer and rename it as P1 ( Layer>new>Layer or Shirt+Ctrl+N), paste your favourite picture into it.
Move it in a appropriate place in our screen, press Ctrl+Right Click on our screen inner edge layer S3 to select the screen inner edge, then click the P1 layer and apply a layer mask to it by clicking the layer mask button.
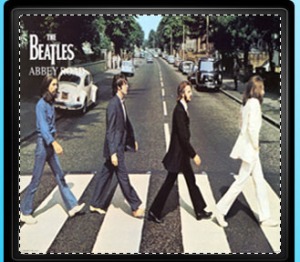
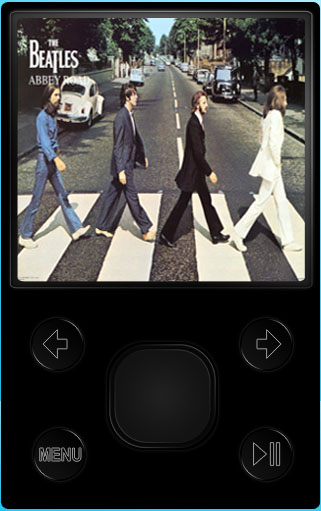
Now we have our wonderful MP4 with a fantastic Beatles album just playing on the screen.










 By dotmapper
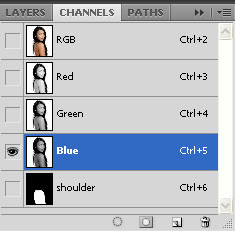 What we need to do here is create a map of the space were the tattoo is going so it will wrap to the form of where we place it. To make the best map possible, we need to find the Channel with the greatest contrast. Cycle through the Channels by pressing Cmnd/Ctr + 1, 2, or 3. Just keep pressing these keys until you land on the channel you like the best. Below, I’ve chosen the Blue channel.
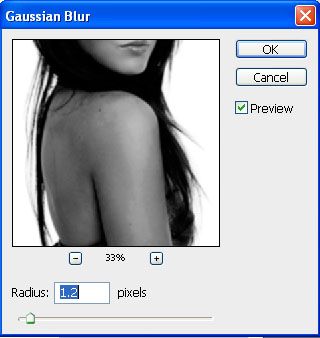 The “Map” document should pop open automatically. Click the document to select it and choose Filter > Blur > Gaussian Blur. The idea here is just to smooth out the map a bit, I’ve chosen 1.2px.
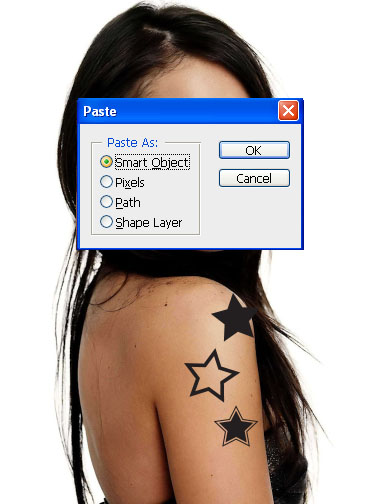 Now we can place the tattoo image we’re going to use. For this example I made some quick stars in Illustrator and copied and pasted them onto a new layer here in Photoshop. Place you Illustrator design in as a Smart Object and resize It to fit where you want it. Hit return/enter.
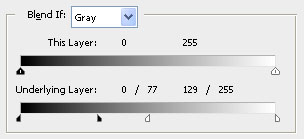
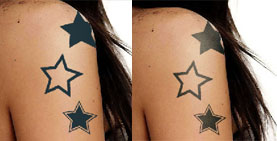 **Notice how the highlights and shadows blend through.


